Well, now that the base cabinet is done, it's time to tackle the upper cabinet moldings. Oh, the agita! (For those of you who aren't Italian, "agita" means "sour stomach." Also known as heart burn.) Have I mentioned that mitering crown molding isn't as easy as it looks?
While I was busy working on the crown for the base cabinet, I figured I'd work on the crown for the upper cabinet after I finished the base cabinet. I had all of the material & I'd already cut the front piece (which is mitered at both ends) to proper length. I just had to get through all of the work.
So I started by sanding the upper cabinet's face frame rails flush with the stiles. Let me tell you, this is much easier to do when there's no moldings on the cabinet. All it took was about 15 minutes of sanding with 100 grit to get everything right. Not long at all.
Next, I found in test fitting the molding that the profiles didn't meet properly. This was because when I bevel ripped the waste off of the molding stock after routing the profile, the rip wasn't made in the same spot on all of the stock. So I needed to remove a little bit from some pieces in order to get everything the same.
Well, I set the bevel angle on the table saw to 45° and set up the fence to remove just the material I wanted to remove. Then I set up my feather board. I grabbed my push shoe and started ripping. It went well, but when I got to the end of the stock, the end I was pushing started to move away from the fence.
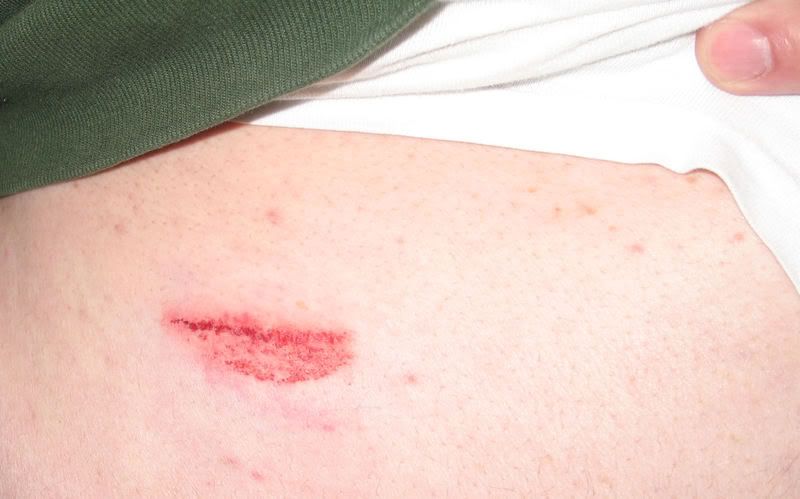
Next thing I know, wham! I've got a piece of crown molding in the flank & I'm in pain.
I was wearing a hoodie sweat shirt & a t-shirt under it. I had a red welt on my side that looked a little bit like lips. It was red because the skin had gotten scraped through all that cloth by the molding. The picture below shows the damage the kickback did to me after a couple of hours. It got very purple after that. (I promise I won't publish a picture like this again. I'm sure people aren't freaking out over the welt, just the sight of my gut! ;) )
And here's what the piece looked like after it's encounter with the blade & my gut. Well, that piece just became a scrap. Luckily, I had lots of molding left over & I could make another piece.
After replacing the piece, I made some glue blocks for the crown molding. I still had lots of beveled stock left over, so I cut a few pieces to length & I glued them to the back of the moldings. I just glued these on to the flat area in the back of the moldings in a number of different places, not bothering with any brads. I did use spring clamps to hold some of them in place.
After waiting about an hour or so for the glue to set up, I began to attach the crown molding to the front of the upper cabinet. A few brads angled through the glue blocks & into the cabinet face frame rail & I was done. Here's how the upper cabinet looked after I was finished applying this molding.
The cabinet sat in our family room for a week or so & each time I looked at the upper right corner, I kept saying to myself, "Something's not quite right with the molding in that corner." I finally grabbed my combo square and held it against the molding in that corner. Well, I was right. The molding wasn't straight across, parallel to the top as the molding in front was. No, it was angled down, droping 3/8" over the 6" length of that side.
More cursing & agita. Did I tell you that crown molding isn't as easy to do as it looks?
Well, that piece came right off with a little sawing & a hammer blow. Now I'm starting to run out of molding, but I still had enough to remake that piece. So once more I'm trying various angles until it's good. Finally I get it done & now that sucker is straight & square.
After finally getting all of the crown molding done, I made the quarter round molding that hides the joint between the top of the base unit & the bottom of the upper cabinet. This molding gets attached to the base of the upper cabinet. I was able to make this molding easily with a couple of passes of the work piece over a 3/8" radius round over bit mounted in my router table. Here's how that molding looks now that it's attached to the cabinet.
About the time that I was struggling with the crown molding on the base cabinet, I went out & bought a 23 gauge pin nailer. I was going to get the Porter Cable to go with the rest of the PC guns I have, but the store didn't have any in stock. They did have a Bostitch model in stock, and it will shoot up to 1 3/16" long pins, whereas the PC only shoots pins up to 1" long. And I got it for about $90 or so.
So I took home my new pin nailer & I loaded up some pins. I set the regulator pressure to 100 psi, as the gun's instructions said to do. I shoot a pin. It didn't get counter sunk -- about 1/32" to 1/16" of it was still sticking out. I turned up the pressure but the best I could get was almost flush with the top of the wood.
I posted on WoodNet & found out that a batch of Bostitch nailers went out with the driver piston too short. As a result, the gun won't countersink pins. Bostitch knew of the problem & all I had to do was call them & they would send me a new driver piston. Which I did the next day. And they said I should have a new driver piston in 2 days.
A week goes by & no driver piston. I call them back. I ended up speaking to the same customer service rep. She tells me she doesn't understand why it didn't go out yet. The system showed it was due to ship that day, a Wednesday, and I should have it by the end of the week.
The end of the week goes by & still no package from Bostitch. At this point, I tell myself that if the package doesn't arrive on Monday, I'm taking the gun back & exchanging it for one that works. The package arrived on Monday & I was able to fix the gun.
The quarter molding had to wait until I got the replacement part for my new pin nailer before I could attach it. I could get away with just clamps & hidden brad nails for everything else, but I couldn't see how I could attach the quarter round unless I could pin it on.So while I was waiting for the part, I made the top molding to add the last shadow line to the crown. This was just clamped in place with spring clamps & Irwin Kwik Clamps.
After I fixed the nailer, I attached the quarter round moldings. I then made & attached door stop pieces from some scraps & nailed those on, shooting the naile from the inside so they won't be seen.
The photo below shows the completed cabinet with all moldings & the door stops in place. I'm very happy with the way this turned out. It came out much better than I expected. This is exactly where the cabinet stands as of this moment.
I still have to make the doors & the shelves. I decided that since it's the dead of winter & I won't be able to apply any finish to this cabinet until some time in March, I'm going to make the doors before I make the shelves. Given the way the lumber is stored in my shed, with the remaining sheet of white oak ply behind the solid white oak. This will let me clear out the blockage & make it easier for me to get that sheet out later.
I'm suffering from a cold right now, so I'm not sure when I'll be able to get back into the shop. But I'll see you soon!


