Tuesday, October 30, 2007

My Evening at WoodCraft

As I write this, I have just returned from spending an evening at the Norwalk, Connecticut WoodCraft, straightening out my lumber. I didn't bring my camera because I didn't want the other guys there using the machines to think I was weird or anything. But it was a cool evening and well worth the time.

This WoodCraft has a fully equipped shop upstairs. They have a 5 HP SawStop and a Unisaw (both table saws, in case you didn't know), a couple of 14" Delta band saws, a Jet band saw (not sure of the size, though I think it's 16"), a couple of drill presses, a Delta DJ-20 jointer, a thickness planer, a radial arm saw (RAS), chop saw, and a couple of router tables. To use their machines, you can either join their woodworker club, which gives you unlimited time in the shop for a certain period, or you can buy a card good for 5, 10 or 20 hours.

I bought a 10 hour card and a 12" Starrett combination square. I have two Stanley combo squares, an old one with a black handle & 12" ruler and a newer one with a 16" ruler & a yellow handle. The nut on the black handle had stripped out, so that one's been useless for several months. The yellow one, it turns out, is not square. So I figured it was time to get a sturdier square. And Starrett has a lifetime warranty on their combo squares: if the square ever goes out of square, you return it to Starrett & they will make it square again.

After a mini adventure getting my lumber & combo square upstairs without dropping anything, I met Frank, who is basically the Keeper of the Shop, at least on Tuesday nights. He is a cool guy & is a retired cabinet maker and he really surprised me when I was using the table saw later on. I'd actually met him a couple of times before when I'd taken some classes at this WoodCraft last winter. He was busy crosscutting some pretty wide (for me) poplar boards on the RAS, about 14" or so. I went over & told him what I needed & when he was finished with his boards he came over to help me.

As you know, I needed to joint the edges of my boards. So Frank gave me the safety run down on the tool & showed me how to edge joint the boards. He let me know in no uncertain terms that I wasn't to touch the cutter head and I wasn't to touch the outfeed table adjustments. I had no desire to touch either, believe me! I like being able to count to 10, and I like being with my family!

I got to do most of the jointing. The DJ-20 was sweet. The tables were more than long enough to support my longest boards, the pieces for the upper cabinet. This went fairly quickly and wasn't any harder than I thought it would be. I'm glad I had a pro like Frank there to help me get started using this tool.

Next, I used the SawStop to rip my boards to final width. The fence was a Biesemeyer clone, and it didn't feel any different from the Biesemeyer commercial fence on my Craftsman 22124. The markings on the tape were different, but no problem to use. I think the markings on the bottom of the tape were metric.

While I was ripping the first board, Frank was watching me carefully. I grabbed one of their plywood push shoes & put it on top of the fence at the start of my cut. I started feeding the stock through & finished with the push shoe. Then Frank said that the only thing he could see that I did wrong was watching the blade instead of the fence. I knew I had to do that, but for some stupid reason I was watching the blade. The fact it had no guard on it is probably what riveted my attention to it. I finished my rips using the proper technique & Frank was satisfied.

That SawStop was sweet! It came up to speed instantly & was very beefy. My 22124 weighs in at about 380 lbs, but this was even more substantial. The blade on it left no tear out whatsoever on my boards, though I did get a little burning on one or two boards. And no, I didn't test the blade brake -- I didn't have any hot dogs with me!

After that, I came home. I had accomplished everything I wanted for the evening and I want to use some of the remaining time to turn some pens with my daughter one weekend. Plus, I used to work in Norwalk & it's a 1 hour drive home, even though it took only 40 minutes to get there from my office.

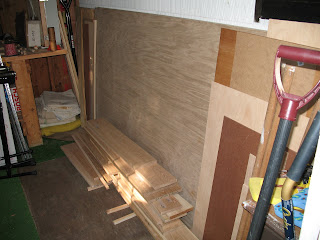
I did take some pictures of the boards after I got home. Here's one of the "sides" for the lower cabinet & the face frame board that will be glued to it at a 135° angle.

And here is one of the upper cabinet's sides & face frame pieces. Remember, these were both cut from the same board.

The other boards look pretty much the same. I'm very happy with the way these came out.

These boards are all cut to final width & length now. The next step is to cut the joinery to form the 135° angle between these boards. As I posted earlier, I'll be using the bird's mouth joint for this. So I'll be practicing it on some poplar scrap the next time I get in the shop.

See you next time!

Thank God for WoodNet!

I was just over on WoodNet, reading a posting called How to clamp 135-degree joint? Near the end of the thread, there's a posting by ezflier with a link to a web page by WoodNet's own Edwin Hackleman. Edwin is a very intelligent guy who seems to delight in geometric puzzles and how to make them with the simplest possible set ups.

The page in question describes the Bird's Mouth Joint. This is a joint specifically designed to simplify cutting & putting together 8 boards to form an octagon. While I'm not building an octagon, the angle at which the face frame meets the "sides" of the corner cabinet is exactly the same. This joint looks like it will be easier to cut. Let me explain why.

Originally, I was planning to cut 67.5° miters on the edges of the side boards & the face frame stiles. I don't know about you, but I don't have any precise 22.5° or 67.5° reference angles lying around, and I don't know where you'd find any. So there would be a lot of trial and error cutting of scrap to get the saw blade beveled to the right angle.

You then have to glue these boards to each other. I had come up with a clamping caul and had posted a picture of it in that thread. As Ms. Nomer says in the thread, there might be a problem with this configuration not providing enough clamping pressure to keep the mitered edges up against each other.

The bird's mouth joint, on the other hand, looks pretty easy to glue-up. The angled board essentially sits in a socket & is self-aligning. All you have to do is clamp a beveled block to the angled piece, then run a clamp horizontally. And you're done!

So I'm gonna give this a shot using some poplar scraps I have lying around at home tomorrow night. Tonight, I'm going to WoodCraft after work & use their jointer. And maybe a table saw to make sure I have all the edges straight & parallel. Or maybe I'll do the ripping another night at home. Let's see how busy the place is.

Monday, October 29, 2007

To Buy a Jointer, or Not to Buy a Jointer; That Is the Question!

Well, I got home today & found the latest Craftsman Club flyer had arrived. They're having their Craftsman Club days Nov 4 - 10. Normally, this doesn't interest me too much, but they're offering their Orion built 6 1/8" jointer for a member price of $386.99. If you read my last posting, you know that I really need a jointer before I can make any headway on this project.

What's a guy to do?

On the one hand, we just shelled out big bucks to vinyl side the house. We also brought back the contractor who replaced our deck last year to repair this shed roof that overhangs the front entrance & garage door. It seems the columns that were holding the roof up were sitting on the ground, not a footer, and had 2 1/2" of material just rot away over time. He jacked up the roof back to where it was supposed to be, dug & poured new footers, and replaced the columns. We just have to paint it.

On the other hand, I do have a woodworking fund. That's where all the money for this cabinet is coming from, as soon as the charge bills arrive. What's another $400 from that fund for a jointer?

Then there's the used market. I should be able to find a decent used 6" jointer if I started looking. Oh, decision, decisions . . .

So I'm adding a poll to the home page. Let me know what you think I should do. I'll let it run a week & will publish the results this weekend.

Sunday, October 28, 2007

Cutting White Oak and Wishing I Had a Jointer

I did manage to get into the shop after church Sunday. I started ripping all of the parts for the face frame and the sides from the white oak. I have two boards that are wide enough to get the sides and the adjacent face frame stiles for the upper case. The boards are wider than I needed, so I decided to rip the parts wider than I needed them to be. Then I could rip the beveled miters I need on the sides that were ripped apart.

I had spent an hour before I started this project making sure the saw was aligned properly. What I didn't do was check the alignment of the splitter to the blade. This would come to bite me, as you'll see.

I took one of these boards & set the fence where I needed it & ripped. Then I put the two pieces back together again, and this is what I saw.

I had put the lines across the joint so I could identify the edges that needed to be adjacent to each other, and so I could get them aligned when I cut them to final length. (I should have cut them to final length first. Not the first time I've made this mistake). The other board came out with the same space in it.

I realized that I have to figure out two things:

  1. How did that space get in there in the first place?
  2. How to get that space out of there.

The only way to get rid of the space is to joint the boards. The problem is that I don't own a jointer. Well, I do own a #7 hand plane, which is called a jointer, but my skill with the tool is non-existant. And I'm not going to buy a powered jointer right now. There's too much else going on & we just spent a lot of money to fix up the house.

So, to get rid of the space, I'm going to load the boards up into my car tomorrow night, and instead of driving straight home from work, I'm going to drive up to Norwalk, Connecticut & visit the Woodcraft closest to my home. I'll rent some time in their shop & use their DJ-20 to get joint the boards.

Now, I had to figure out how the space got in the boards. The first thing I did was re-check the alignment of the fence to the miter slot & the blade. I did adjust the fence a little bit, but I really didn't think this was the problem. Watching the edge of a board as it rode against the fence while ripping showed me that the board was pulling away from the fence at the end. I was careful to set the fence parallel to the blade & the miter slot, and my measurements showed it was parallel.

That's when I thought to check the splitter's alignment. Sure enough, it was off. I adjusted the splitter, but by now I had no rips left to make. I did rip a piece of poplar later to make the blanks for the legs, and that looked like it rode better against the fence.

Next job was to cross cut parts to length. I used my Osborne EB-3 to make these cuts. I cut the sides & stiles to final length, leaving them wider than I need. I had ripped the face frame rails to final width, but I cross cut them longer than I needed. These parts will get cut to their final dimensions later.

Here's what all of the face frame & side stock looks like after an afternoon spent cutting & cussing.

The last thing I did today was actually cut all of the blanks for the legs & glue them up. Here's what they looked like in the clamp & waxed paper. These will get ripped to final size after the glue has dried, then drilled to accept the leg leveler t-nuts.

I should have put cauls on these blanks because one or two of them slipped while I was eating dinner & the glue was setting up.

See you next time!
Long Island Woodworker's Show

It was raining Saturday moring when I got out of bed, so I decided to go to the Long Island Woodworkers Club show. Let me get the really bad news out of the way & tell you up front I forgot to bring my camera. Sorry, I didn't get any pictures.

Mind you, I didn't make this decision lightly. It's about a 2 hour drive to get there in decent traffic. I live at the extreme northern end of Westchester county. In fact, crossing the town line north of here brings you into the next county. I have to drive all the way through the county, cross into the Bronx, and drive through there to one of the bridges to Queens. Then I have to drive out from Queens through Nassau county and into Suffolk county.

The good thing is it was a Saturday morning, so traffic was likely to be lighter than on a weekday. The bad thing is it was raining, meaning that traffic probably wasn't going to move as fast as it normally would on a Saturday morning. Long Island is a nice place to visit, but I hate driving there. It ended up taking about 2 hours each way.

I had gone to the show two years ago when it was in the basketball arena at Hofstra University, and it was a good show with lots of vendor booths & demonstrations. As I recall, the show was in April that time. There were a couple of guys outside the venue with a portable bandsaw mill. They were turning a log into planks. There was even a booth inside that had a CNC router they were selling. Very cool stuff, and I even got to sit in on a couple of seminars.

This year, the show is in October and it was at the Loyal Order of the Moose Lodge in Greenlawn. I had never been to Greenlawn before and it seemed like a very nice town. The show was a lot smaller than the previous show I had been to. There were only about 5 vendors there, and no CNC routers to be found. There was a group of guys from the LI Scroll Sawyers Club demonstrating scrolling.

And there were a lot of incredible projects on display. There was a fantastic tool chest that was made of curly maple and other colorful woods. It was full of hand tools & reminded me of the antique tool box that Norm showed on the episode of the New Yankee Workshop where he makes a hanging tool box.

There were some incredible examples of the scroll sawyer's art on display, including a scroll sawn version of the famous painting on the ceiling of the Sistine Chapel where God reaches down from heaven to touch the hand of man. And there were scroll sawn portraits of the presidents on display, too.

Frankly, I felt the venue was too small. The place was too crowded, given the fragile nature of some of the exhibits. It would have been better if they could have put the projects on display in a space separate from the vendors. I never did find any of the seminars.

I only stayed an hour, but I did get a Kreg K3 Master System pocket hole jig kit while I was there. The show price was 10% off and I got a free box of screws with it. I played with the jig when I got home and cut a piece off of a scrap of ply and attached it to the rest using the jig. It works!

I hope to get into the shop tomorrow afternoon after church and cut some wood.

Friday, October 26, 2007

Google Analytics & the LI Woodwoker's Show

When I started this blog, I posted about it on the WoodNet forums. You've got to get readership somehow, so I figured that would be a good way to start. A couple of other bloggers that read WoodNet told me about Google Analytics. This is a site that, coupled with a couple of lines of HTML & a JavaScript library Google provides, can give you incredibly detailed information about the people reading your web site. Now, no names are given, and no IP addresses, but it does tell you things like what countries, states, and cities your readers are from (or at least, where their ISP is located). It also tells you how they got to your web site -- whether it was through a link from another website or directly (i.e., they have a favorite pointing to your web site), or even through a search on Google. I was browsing through the statistics today & I found that a number of my visitors have come to the blog through The Woodwhisperer's web site. Well, my first thought was, "How are these folks getting to my site from Marc's? Where's this link they're using?" So I hopped over to Marc's site & I find he's got a section on his page called "What Marc's Reading." When I open the list, I find a link to one of my posts. Cool! I'm pretty sure this was done using a feature of blogger called Back Links. My next thought was, "Hey, Marc's a reader! Cool!" So I'm going to implement that feature myself. Anything to help out a fellow blogger and send traffic their way! On another topic, the Long Island Woodworker's Club is having their annual show this weekend in Greenlawn, NY. I went to their show a couple of years ago when it was at Hofstra University and it was cool. I got to meet Zig of Bow Clamp fame there. I didn't buy any cauls then. I didn't have too much cash with me and I wasn't expecting the huge array of stuff on display. I think I had to drink a gallon of water to make up for all the drool I trailed behind me that day. If it rains tomorrow as the weather men are saying it will, then I will attend the show. If it's sunny, the family & I are going to start painting the trim on our newly vinyl sided home. So let's hope for rain, eh? If you're on Long Island or in the south eastern NY area (NYC, Westchester County, Rockland County, or even SE Connecticut), you should check out the show. And maybe I'll see you there!

Thursday, October 25, 2007

Cutting Plywood

With this post, I'll have brought everyone up to date with this project. From the next post on out, you'll be learning of stuff I've done within 24-48 hours of my actually doing it.

A quick recap: I have all of the stock, both solid white oak and plywood. I've laid out all of the parts on the stock. I've ordered and even received all of the hardware. I've determined in what order I'm going to make the parts & put everything together. I've cut out a pattern for the top & bottom shelves. Time to cut up some plywood!

My first task was to get the garage set up for breaking down the plywood. Those of you who have read my postings on WoodNet may have read that my "shop" is actually a 1 car garage, 10' wide by 24' long. I have to share it with our minivan in the winter. But right now, it's all mine. I also have a shed attached to the side of the garage. The only way in or out is a double door with a pad lock. My chop saw, bench top drill press, routers, circular & jig saws, thickness planer, and all my wood live in the shed when not in use.

In the garage, I use 2 metal folding sawhorses with three 2x4's on top, and a partial sheet of 1/4" plywood on top of them as a work table. This is where I do most of my glue-ups, all of my chiseling, sanding, etc. When I do big glue-ups, I just use the saw horses to hold the pieces at a comfortable height. This arrangement is far from optimal, and I'll do something about it one of these days. For now, I just make do.

This work table normally sits butted up against the only unbroken long wall in the garage. For this operation, I wanted the saw horses in the middle of the garage with two of the 2x4's on it. This would let me get to all sides of the sheet & keep me from cutting into the top of my work surface (something I've done in the past).

Using my new panel carrier (shown in the picture below), I carried a sheet of my oversize plywood from the shed to the garage by myself. This was pretty cool since I needed my wife's help to get the sheet out of the van & carry it into the shed when I brought it home. Lifting with the carrier was much easier than trying to lift the sheet up so I could get one hand under it. All I had to do was lift one corner & slide the the channel underneath. Once the sheet was in the channel, I grabbed the top edge of the sheet in the middle with my left hand, held on to the handle of the carrier with my right, bent my knees & lifted. Piece of cake!

I did get a little assistance putting the sheet up on the saw horses. I was afraid that I'd drop the sheet & mess up the good face, knowing my butter fingers & how Murphy likes to look over my shoulder. Thankfully, Mary & I were able to get the sheet up on the sawhorses & 2x4s without trouble.

Now I referred to my pattern for the top / bottom shelves. I measured it's width & length, then added 1/4" to each dimension. This is the size of the blanks I needed to cut for the shelves. This turned out to be 18 5/8" x 33 1/4".

Starting at one end of the sheet, I cut two pieces 33 1/4" long by the width of the sheet using my circular saw & home made cutting guide. Before I made the cut, I did use my speed square to ensure that the corners of the plywood were really square.

I carried another sheet of plywood out of the shed into the garage and set it up on the sawhorses & 2x4's with my son's help (he's only 8, but he's a big boy!) I then referred to my drawings for the rough dimensions of the back pieces. These turned out to be 22" x 26" for the base cabinet and 22" x 41 for the upper cabinet. I then repeated the steps I used to cross cut the parts for the shelves and cross cut two pieces for the wide backs.

After cleaning up, I put the saw horses back in their normal position & set my work table back up. Then I pulled out my table saw & ripped the four pieces of plywood into the blanks I needed. The large pieces left over from cross cutting the sheets with the circular saw went back into the shed. They were a lot lighter going back than they were coming out!

With the rip cuts done, it was time to cut the shelves to rough shape. I placed the pattern onto a shelf blank and clamped it down so the pattern wouldn't move. I placed witness marks on the blank so I could relocate the pattern in the same spot when I was done rough cutting.

I then took a 1/8" wide strip I had left over from another project that was lying around the shed. I cut a length about 2' long off of it with a hand saw and placed that next to one edge of the pattern. I then drew a straight line using the strip as my guide. I repeated this on all sides of the pattern. Next I removed the strip, clamps, and the pattern & made a series of cuts to get the blanks to rough shape.

The set up for the first cut is shown below. The 12" K-bodies are holding the blank to my work table so it won't fall or move. The 6" Tradesman clamps are holding the straight edge guide to the blank.

I made a series of similar cuts to get the blank to rough shape & size. I then repeated this process with the other three blanks. When I was done, I had four shelves that were larger than I needed with some tear out. They weren't all the precise shape they needed to be.

Next I chucked a 3/4" flush trimming bit up in my DW621 plunge router. I then attached the pattern to a shelf with double stick tape (see below). I turned the pieces over so the pattern was on the bottom. Next, I set the height of the bit so the bearing bit rode against the pattern & full thickness of the shelf was cut by the cutter. One pass all the way around, followed by some sanding of the edges of the blank with 80 grit paper on a block to clean up the edges, and I had a finished shelf.

The last thing I did last weekend was to plane the white oak I got from Condon's that will become the 6" wide front sides to thickness and ripped them to rough width. With some luck, I'll get back into the shop this weekend and make some more sawdust!

Tuesday, October 23, 2007

Making the Top / Bottom Shelf Pattern

The cabinet body, and it's shelves, are all six sided figures. Each carcase has permanently attached top & bottom shelves. Both of these shelves have to be identical. So there is a total of four (4) shelves that have to be cut exactly the same. Due to the angles and dimensions, it's hard to cut this shape on a table saw & get right once, let alone multiple time. So just how do you ensure that all four shelves will be identical?

The answer is to use a pattern. We carefully cut one shelf to size & shape using a cheaper material, in case we screw up & have to do it again. Once the pattern is created, we can then use it to lay out the four copies. These are then cut out over size using a circular saw and a straight edge guide. Lastly, the rough cut shelves are cut to final size & shape using a bearing guided straight bit in a router.

I had picked up a couple of quarter sheets of 3/4" thick MDF from Home Depot a week before the lumber arrived. Home Depot calls these "handy panels". They're a lot lighter than full sheets of MDF. One of these would become the pattern for the fixed shelves. The other will become the pattern for the adjustable shelves when I get around to cutting them.

I carefully laid out the shape of the top & bottom on one piece. The results can be seen in the picture below.

The next step was to cut off the waste on the left side of the pattern. Here's the set-up I used to make this cut. And yes, I'm positive this speed square is indeed square, and that the 45° corners are indeed truely 45°.

I lined up my guide with cut line. Then I clamped my speed square to the blank to make sure it wouldnt't move & to keep the guide square. Then the guide was clamped to the blank. The whole set up is sitting on top of 4 pieces of scrap to keep them elevated above the work surface. Next the speed square is removed & the cut is made.

Now I removed the waste in the upper right-hand corner of the blank. Here's what that set up looked like.

The speed square was clamped to ensure the saw would cut at a true 45° angle to the edge. I started on this side because I had the greatest confidence in the measurements of that corner.

After making this cut, I then cut the other 45° corner off using a similar set up. I wanted to make sure that these two cuts met at a true 90° angle. Here's what the pattern looked like after these two cuts were done.

Now it's time to cut off the short corners. To do this, I turned to my table saw. I set up the rip fence so that the saw would cut off the short corner opposite the long edge I placed against the fence. This takes advantage of the fact that the short corner is parallel to the long edge opposite it. The following picture might make this clearer.

After making this cut, I then rotated the blank 90° and repeated the cut with the fence unmoved. This is what the blank looks like after these cuts are made.

Just one cut left, to form the short edge parallel to the long front edge. This was done by adjusting the fence to the right value & cutting. The finished pattern can be seen below.

After cutting it out, I compared the length of the right short side to the left short side and they are within 1/16" of each other. This is close enough for me; an observer will never be able to see that difference. I am extremely happy with the way this pattern turned out. Thank you, Jesus!

Next: Cutting Plywood

So Just How Do You Make a Corner Cabinet?

OK, we have the wood. We've even ordered the hardware. So just how do you take that pile of wood & make a corner cabinet out of it?

The answer is that you have to figure out an order for cutting out the parts & performing all of the operations necessary to join & shape the parts.

Here's the list that I've come up with.

  1. Make pattern for Top / Bottom Shelves
  2. Cross-cut blanks for Top / Bottom Shelves to rough length
  3. Cross-cut blanks for Wide Backs to rough width
  4. Rip blanks for Top / Bottom shelves to rough width
  5. Rip blanks for Wide Backs to rough width
  6. Lay out over-sized shape of Top / Bottom shelf on each blank
  7. Cut Top / Bottom shelves to rough size & shape
  8. Use router with pattern bit to cut Top / Bottom shelves to final size & shape.
  9. Plane stock for Base Cabinet Sides to thickness
  10. Rip Sides for both cabinets to rough width
  11. Rip Face Frame Stiles to rough width
  12. Rip Face Frame Rails to final width
  13. Cross cut Base Cabinet Sides and Face Frame Stiles to final length
  14. Cross cut Upper Cabinet Sides and Face Frame Stiles to final length
  15. Cut all rabbets (Top / Bottom Shelves. Base Cabinet Sides, Upper Cabinet Sides)
  16. Cut all dadoes (Base Cabinet Sides, Upper Cabinet Sides)
  17. Fit Sides to Base Cabinet
  18. Fit Sides to Upper Cabinet
  19. Set bevel angle on table saw to 22.5° using Wixey & scraps to fine tune
  20. Rip Sides to final width
  21. Rip Face Frame Stiles to final width
  22. Reset blade to 90°
  23. Lay out Face Frame Rails
  24. Cut all Face Frame Rails to final length
  25. Fit Wide Backs to Base Cabinet
  26. Fit Wide Backs to Upper Cabinet
  27. Set blade to 45° using Wixey & scraps to fine tune
  28. Rip Wide Backs to final width (beveled cut)
  29. Rip Base Cabinet Narrow Back & Upper Cabinet Narrow Back to width (blade still set to 45°)
  30. Dry fit Base Cabinet
  31. Fine tune joints
  32. Dry fit Upper Cabinet
  33. Fine tune joints
  34. Reset blade to 90°
  35. Cut Foot Blanks to rough width & length
  36. Glue up Feet from the Foot Blanks, 4 blanks to a foot.
  37. Rip Feet to final dimensions
  38. Drill hole for leg levelers in all blanks for the Base Cabinet
  39. Glue Feet to the Bottom Shelves
  40. Extend leg leveler hole through the Base Cabinet Bottom Shelf
  41. Install leg levelers
  42. Drill shelf pin holes in Sides & Wide Backs
  43. Glue up Base Cabinet
  44. Glue up Upper Cabinet
  45. Cut the three Base Cabinet Top pieces to final width & rough length (best if I can get them from one piece)
  46. Route all molding profiles
  47. Cut arc in bottom of Base Board
  48. Set bevel angle on table saw to 22.5° using Wixey & scraps to fine tune
  49. Fit & miter moldings to Base Cabinet
  50. Glue & brad moldings to Base Cabinet
  51. Fit & miter Base Cabinet Top pieces
  52. Glue & brad Base Cabinet Top pieces to Base Cabinet
  53. Fit & miter moldings to Upper Cabinet
  54. Rip blanks for Adjustable Shelves to rough width
  55. Make pattern for Adjustable Shelves
  56. Cross cut blanks for Adjustable Shelves to rough length
  57. Lay out shape of Adjustable Shelf on each blank
  58. Cut Adjustable Shelves to rough size & shape
  59. Use router with pattern bit to cut Adjustable Shelves to final size & shape.
  60. Cut Adjustable Shelf Edging to final width & rough length
  61. Cut rabbet on front edge of Adjustable Shelves
  62. Cut rabbet on Adjustable Shelf Edging
  63. Fit Adjustable Shelf Edging to Adjustable Shelves (ends have 45° miters)
  64. Finish Base Cabinet, Upper Cabinet and Adjustable Shelves
  65. Install Base & Upper Cabinets in dining room
  66. Cut blanks for Lower Door Panel to rough width & length
  67. Glue up blanks for Lower Door Panel
  68. Cut blanks for Upper Door Panel to rough width & length
  69. Glue up blanks for Upper Door Panel
  70. Cut Lower Door Stiles to final width & rough length
  71. Cut Upper Door Stiles to final width & rough length
  72. Cut all Door Rails to final width & length
  73. Cut curve in Upper Door Top Rail
  74. Cut grooves in all Lower Door Rail & Stiles
  75. Cut grooves in both Upper Door Stiles & the Upper Door Bottom Rail
  76. Cut deeper groove in Upper Door Top Rail
  77. Cut arch in Upper Door Top Rail & sand smooth
  78. Cut stub tenons on the ends of all Door Rails
  79. Cut decorative grooves in Upper & Lower Door Panels
  80. Dry fit Lower Door
  81. Fine tune joints
  82. Dry fit Upper Door
  83. Fine tune joints
  84. Glue up Lower Door
  85. Glue up Upper Door
  86. Cut Lower Door Stiles to finish length
  87. Cut Upper Door Stiles to finish length
  88. Make Door Bead Edge Molding
  89. Set blade to 45° using Wixey & scraps to fine tune
  90. Fit & miter Door Bead Edge Molding to Lower Door
  91. Glue & brad Door Bead Edge Molding to Lower Door
  92. Fit & miter Door Bead Edge Molding to Upper Door
  93. Glue & brad Door Bead Edge Molding to Upper Door
  94. Finish doors
  95. Mount hinges to doors
  96. Mount doors to cabinets
  97. Mount Knobs to doors
  98. Mount doors to Cabinets
  99. Mount door catches

As you can see, there's a lot to do. Most of these steps actually only take a couple of minutes to perform, but some of them (like finishing) can take days. Especially at the rate that I work. Since this is a hobby, I refuse to feel obligated to rush. However, I would like to have everything up to step 65 done before Christmas. I think I can make it, but there's also a few chores around the house that will eat up a few weekends. Wish me luck!

Next: Let's Make Some Saw Dust!

Sunday, October 21, 2007

The Layout

Now that we've got all the lumber, we have to figure out which boards will yield which parts. This is more art than science.

Some of this was easy for me. For example, I had specified 1/2" thick stock for the blanks to make the door panels from. This material came to me already planed to 1/2" thick. So I was able to put these boards aside, knowing I'd get the pars for the door panel glue-up from them. Also, I have a number of moldings to make and their thicknesses start off around 7/8" or 15/16" thick. Again, the stock for these parts was easy to identify & put aside.

To get started on the rest, I hand entered into CutList Plus the dimensions for all of the stock I had on hand. When I had the moldings in the list, I kept getting messages from the program about not having enough stock. So I removed all of the moldings from the cut list because the program isn't smart enough to figure out, for example, that you can cut several moldings 1/8" thick by 3/4" wide from a 3" wide 3/4" board. The program easily fit the rest of the parts on my stock.

Here's an example of what one of these layouts from CutList Plus look like. There is a total of 20 of them in the project.

Posted by Picasa

Now, even though CutList had generated all of these layouts, I just used them as a starting point. There's no way to specify to CutList where imperfections are in the boards, so it doesn't take them into account. CutList just assumes that the entire board is clear with straight grain & you can rip & cross cut parts sequentially from a given board. A board from a real tree is rarely so generous.

One of the cool features CutList has is it will print out labels with information you specify about each part . This allows you to take a board, roughly lay out where on it each part is to be cut, then stick the appropriate label onto the wood. No damage is done to the surface, as contrasted with pressing too hard with a pen or pencil, or staining the fibers with ink. Once the parts are all cut out, it also helps you identify which piece is which, so you'll know where to put it in the final assembly.

It took a couple of hours, but I finally got all of the major parts laid out. The only parts not laid out on the solid oak are the moldings. I'll deal with the moldings later when I get to that point while building the cabinet.

I also didn't bother laying out the cuts on the plywood. The sheets are too heavy & ungainly to handle easily. These just went up against a wall in my shed & are waiting to be cut up. In spite of what CutList says, I will cut the four (4) top & bottom shelves from one sheet, the four (4) adjustable shelves from another, and all of the back pieces from the third. It's just easier to get parts that have to be the same size identical if you cut them with the same set up.

Here's what all of the stock, including the ply, looks like stored in my shed.

Posted by Picasa

We also need to get hardware! The cabinet will sit on three (3) adjustable leg levelers to compensate for the floor & tack strips in the corner. We need two (2) hinges for each door that match those used on the china cabinet. We need two knobs for opening & closing the doors. And we need catches to hold the doors closed. And adjustable shelf pins. Gotta order all of this stuff now so it will be here when we need it!

Plus I'm getting a little old to be lugging around 4' x 8' sheets of plywood weighing close to 100 lbs. I saw a post on WoodNet with a picture of gadget that you slip under the edge of a sheet of ply & it looks like it makes carrying the sheet a lot easier. Think I'll order one of those, too.

Next time: So just how do you make a corner cabinet?

Saturday, October 20, 2007

Buying the Lumber

Let's recap where we are. We've talked about the woodworking process. I've designed the corner cabinet & I've shown it to you. We've talked about cut lists and the different kinds of figure available for white oak. It's time to go shopping for wood!

After designing the cabinet in SketchUp , I used the cut list Ruby Script to generate the cut list for the project. I then imported the resulting file into CutList Plus. Here's a screen shot from CutList Plus to show you what it looks like.

Posted by Picasa

To summarize, according to CutList Plus and the information I had in it initially, I needed to buy nine (9) white oak boards at 4/4 x 6.5" x 96", one (1) at 5/4 x 6.6" x 96", and three (3) sheets of white oak veneer core plywood at 4' x 8'. This actually would have left me with a fair amount of extra material, but I planned on buying 10 full 4/4 boards and 2 5/4 boards, just to be safe.

With this done, I knew exactly how much wood I would buy if I were to go to the hardwood dealer myself & pick through the bins. Now I started looking at prices.

In my area, 4/4 plain sawn oak goes for $4.20 a board foot, while rift & quarter sawn go for $5.75 a board foot. Looking around in other areas that weren't too far from me, I found prices were about the same. At this point, I decided to go with plain sawn white oak for the cabinet instead of quarter sawn, since the price difference was significant. But I still wanted to do better than $4.20 a board foot.

There's a user on WoodNet named Barry who lives in the southern part of the same county I live in. I explained to him what I was trying to do and asked him where he gets his wood. He told me about a place in upstate New York called Lakeshore Hardwoods, which is cheaper than the wood sources local to me and ships at a reasonable rate. He also said that this fellow there named Brian is very conscientious & does a good job of grain matching. Thanks for the tip, Barry! A phone call to Lakeshore Hardwoods got me in contact with Brian. Brian told me that the price for plain sawn white oak was $3.50 a board foot, a $0.70 difference from my local supplier. Brian asked me to email him my cut list and he would get back to me with a quote.

I took the full cut list and removed all of the oak plywood parts from it. I emailed the list to Brian and the next day he got back to me with a quote that I found quite reasonable. The rough lumber came to $125 and he would ship the order to me for $38. For an additional $49, he would also plan my stock smooth & to thickness.

It turns out that with the shipping, the difference in price from the local place was pretty much a wash. I do know that the price for milling the lumber locally would be higher than Lakeshore's price. So I decided to go with Lakeshore and have them mill the lumber, too.

About a week later, I received two packages from Brian with my wood in them. Looking through them, I was impressed with the quality of the wood and the job of grain & color matching Brian had done. I'll be using them in the future.

Well, at this point, I needed to figure out which parts to cut from which board. So I measured each board I received & wrote down the dimensions. I then entered those dimensions into CutList Plus and indicated that I actually had the boards in inventory. But when CutList did the layout, it kept telling me I didn't have enough stock for all of the parts.

After scratching my head for a while, I decided to take a look at the email I had sent to Brian with the cut list. I then realized that I accidentally removed two of the solid oak parts from the list when I removed all of the oak ply parts! Doh!!

At this point, I needed to go to M.L. Condon's to buy the oak ply I needed, so I decided to pick up a couple of white oak boards to make up the short fall. That's when I found out that Condon's had raised their prices since the last time I was there. After some searching, I was able to find three different boards that were straight, or at least had a long enough straight section in it to get the parts I was missing. Here's what all of the lumber looked like after I got it home.

 
Posted by Picasa

Next I went and looked at their plain sliced white oak ply. This looked very good, and as it turns out, was actually a full 3/4" thick, and 48 5/8" wide x 96 11/16" long! You don't find plywood like this at the Home Depot! The outermost veneers are fairly thin, though, so I'm going to go easy on the sanding when the time comes.

Next time, we'll talk about laying out all of the parts on the stock

Decisions, Decisions

After finalizing the design of the cabinet, I gave thought to just what kind of wood I'd use to make it. I knew that I would use white oak, but that's just the species. There are actually three different kinds of white oak you can buy:
  • Plain sawn
  • Rift sawn
  • Quarter sawn

The differences between these three types have to do with the appearance of the grain on the face of the boards. The grain patterns are determined by where the board was in the log & it's position relative to the growth rings.

If you look at the ends of a plain sawn oak board, the growth rings pretty much arc across one of the faces of the board. This produces an effect called "cathedral grain". That is, the grain makes a very high arching pattern on the face of the board. Here is an example of the grain on a plain sawn white oak board.

The growth rings on rift sawn oak run at about a 60° angle from one face to the other. This produces very straight grain patterns with no arches. It's also rather plain looking, since the grain essentially forms parallel lines along the length of the board. Here is an example of the grain on a rift sawn white oak board.

Quarter sawn oak boards have the growth rings running perpendicular or nearly perpendicular to the faces of the boards. Oak trees have these structures in them called medulary rays. These rays run from the center of the tree to the outside in a radial fashion, and help strengthen the trunk. They're not visible in plain or rift sawn oak, but become visible in quarter swan stock. They produce interesting effects in the grain that run generally perpendicular to the grain on the face and produce that classic Arts & Crafts or Mission look. Here is an example of the grain on a quarter sawn white oak board.

This article has an excellent picture showing you how logs are plain sawn, rift sawn, and quater sawn.

When you plain slice a log, you will get boards that are rift & quarter sawn, simply because of where the board came from in the log. Most of the boards, though, will have plain sawn grain. In addition, plain slicing results in the least amount of waste from the log (maximum yield). If you were to truly quarter saw a log, you would get the most waste (minimum yield). So when it comes to price, plain sawn stock is the cheapest and quarter sawn is the most expensive. Rift sawn stock can be as expensive as quater sawn.

Then I started looking at the actual prices for these kinds of white oak. The difference in price between plain & quater sawn is about $1.55 a board foot. This is a significant difference. I just couldn't justify the additional cost. So I decided that I was going to use plain sawn white oak for this cabinet. A closer examination of the wood in our dining room set convinced me that there was no quarter sawn material in the any of the pieces, so using plain sawn would actually make the new cabinet match the existing pieces better.

Next time: Buying lumber

Friday, October 19, 2007

The Cut List

Now that we've designed the cabinet, we have to figure out how much wood we will need to make it. Just how do you do that? Each part in your project requires a certain amount of wood. Each has a thickness, a width and a length. When you designed the project, you figured out what all of the parts were and what their dimensions have to be. So you basically create a list of all of these parts, listing where they go in the final assembly as well as their names, thickness, width, length, and what kind of wood you want to use to make them. If you have more than one copy of a part, you can just write down you need so many copies of it, rather than list it multiple times. This list is your cut list. From the cut list you can determine how much wood you need to buy. Once you know how much wood you need to buy, you can estimate how much the materials will cost. And once you know what it will cost, you know just how expensive this hobby can be. Talk about frightening . . . and it's not even Halloween yet! If you use Google SketchUp to design your project, you can actually use it to create your cut list. SketchUp uses the Ruby Script scripting language as an automation tool. There are lots of clever people out there who have the free time to write some cool Ruby scripts for SketchUp (they obviously don't have kids). One of these will generate an exploded view of your project (available at smustard.com for $10). Another will generate a CSV (comma separated values) file containing your cut list that you can import into Excel or some other spreadsheet program. You can download this Ruby script for free here. Once you have your cut list, there's another program that you can use to estimate how much stock to buy. This is called CutList Plus. I do use CutList Plus, which has a "Silver Edition" which costs about $70 to purchase and is more than adequate for my needs. The output that it generates is extensive, because it's intended to be used by someone who is pricing a job & generating estimates. You get additional features with the Gold Edition, but you have to pay more, too. To use software like CutList Plus, you first enter the various sizes and prices of different kinds of stock at vendors near you. You next import the CSV file created by the SketchUp Ruby Script into the program, or you hand enter the cut list if you don't have SketchUp or the cut list Ruby script. The software next determines how many boards you need to buy at what sizes, how many sheets of plywood you need, etc. It even takes waste into account. When it's done with its analysis, the program tells you how much the materials will cost and how to cut each part from the stock. This last bit is a little problematic. Programs like CutList Plus can't take into account the grain of the specific boards you purchase, so it really can't tell you the best way to cut your stock into parts. You have to use a little judgement when laying out the parts for your project from the stock to choose the best looking grain & orient the parts relative to the grain (more on that another time). This basically means there could be more waste from a board than the program computed, and / or you can't cut all of the parts from that board the program computed you could. Still, software like CutList Plus will get you in the ball park, as far as cost and amount of stock you'll need. You just need to remember to buy a one or two boards more than CutList says you need. Having the extra stock also comes in handy should you accidentally trash a part while you're making it (not that I've ever done this myself. This is my story & I'm sticking to it!) Next time, we'll talk about choosing the materials. Fun!

Thursday, October 18, 2007

Meet the Corner Cabinet

I think it's time I showed everyone this corner cabinet that I've mentioned several times. And while I'm at it, I'll talk a little about the design process for this particular project. About a year ago, my wife approached me and asked me to build a cabinet that would stand in a corner of our dining room. Currently, one of the chairs from our dining room set sits there, and has a wicker basket sitting on it. In this basket are various bags of chips & Cheese Doodles snacks for the kids. She wanted the cabinet to hide all of these snacks, which have actually spilled onto the floor next to the chair. So I began designing a cabinet. I felt the cabinet needed to match our china cabinet and the rest of the dining room set. The dining room set was purchased from Macy's 10 years ago, after we bought our house. The set is in the Mission style and is made from what I think is white oak, though it could be red oak. I decided initially that I wanted to make this set from white oak, which is the traditional choice for Mission style furniture. I wasn't too worried about the wood choice & the price of the materials at this point, though. I just wanted to establish the dimensions & joinery to be used, knowing I was going to use white oak when the time came to purchase the materials. I also wanted to produce something that would have decent proportions & look good on paper. When I designed the cabinet, I determined that all of the moldings I'd use on it would have to match the moldings on the china cabinet I used as a model. Other dimensions, such as the length of the arches in the top door & the base molding, would be scaled based upon the width I wanted the parts to be. I also incorporated various design elements on the original, such as the decorative grooves cut in the door panels. Here's what I came up with:
This is the corner cabinet from the front. The cabinet has six sides. Three sides will be visible from the front and three will be in the corner. The cabinet will come out about 2 feet from the corner, where a narrow side 6" wide comes out from each wall at a right angle. A long side then joins these two short sides together. And each cabinet has a single doors made about as wide as I thought I could made them.

Here is the cabinet from the right side. Here you can clearly see that the cabinet is made up of two carcases, one on top of the other. I did this for weight reasons; the lighter pieces are easier to move. Each cabinet sits on three legs made up of glued up pieces of poplar. The legs won't be visible & needn't be made from oak, since the poplar will easily be able to support the weight.

The base cabinet will have three pieces of oak mitered to form a "top" overhang. The upper cabinet will have a quarter round molding that will sit on top of this "top". The idea is to give the appearance that the two cabinets are one by hiding the seam between them.

And here it is from the left side. I wanted to show a picture of the china cabinet on which I modeled this cabinet, but I can't get a good shot right now. I'll try again another day when there's more light. The base cabinet will have leveling feet installed in its legs. Because the cabinet will sit in a corner of a room that's wall-to-wall carpeted, I wanted to be able to compensate for the tack strips in the corner & keep the cabinet level. The drawings were made using Google Sketchup. This is a free program that does 3D drawings. It's not a full blown CAD program, but it's a great tool for doing what are essentially three dimensional sketches using the computer. You can be as accurate with your dimensions as you want. Highly recommended. I decided that I would make all of the parts that would be in the front of the cabinet out of solid oak. These parts are the most visible parts and I want them to match. The parts that back up against the wall will be made out of oak plywood. The plywood would be stable (that is, plywood does not change width or length when the humidity changes) and so I wouldn't have to worry about wood movement for those parts. Also, since the inside parts would be visible only when the doors were opened, the ply only needs to have one good face. I also determined that the height & spacing of the interior shelves would be adjustable using shelf pins, and that I would make them from oak ply with solid oak edging rabbeted to the front edge. This would hide the plywood edges & give the impression that the whole piece was made from solid oak. So that's the cabinet! Next time, we'll talk more about the cut list.

Tuesday, October 16, 2007

The Woodworking Process

Welcome back! I figure it's time to talk about the process that you go through to build a project. It's more involved than you might think. The Woodworking Process In simplest terms, these are the steps that you go through to build a project: 1. Define the project 2. Design the project 3. Purchase materials 4. Let the wood acclimate 5. Build the project 6. Finishing Let's talk about these steps in a little more detail. Define the Project By "define the project", I simply mean you have to decide what it is you're going to build. There are many ways to do this: your spouse or significant other asks you to make something, you see a piece of furniture that you like in a friend's house, magazine, store, or catalog, or you wake up one morning & say, "I'm going to build a table". Design the Project This is the process by which you decide how the finished piece will look, what it's dimensions are, and how you will build it. This process can be as simple as a stick figure sketch on a napkin or a full blown blueprint drawn up in a CAD package. If you got your idea from a magazine or a book, they may even have ready made plans for you to follow. Often, people building from plans will make changes to the plans to suit their own needs. You don't have to build precisely what the plans call for. Purchase Materials After you have your plans, you create something called a cut list. This is a listing of all of the parts that you will eed to make, their dimensions and the type material you will use to make each. From this you can estimate how much material you will need to buy. With cut list in hand, you go to the lumber yard & pick out your material. This involves sorting though stacks of lumber for wood that matches in color & grain patterns. After you pick out your lumber, you pay for it and take it home. You will also need to buy any hardware needed to make your project, such as screws, hinges, drawer pulls, drawer slides, etc. You usually get these items from a local hardware store or you can order it on the Internet. Now comes the fun part, right? Well, not yet. Let the Wood Acclimate First you have to let the wood acclimate to your shop. That is, you have to let the wood's moisture content equalize to the humidity in your shop. This is because wood expands with increases in humidity & shrinks with decreases in humidity. As the moisture content in the wood changes, you'll find that the boards you've bought might actually twist, bow, crook, or cup. We'll talk more about wood movement some other time. Build the Project Now we finally get to the fun part! After the wood has acclimated, you can begin construction. This involves cutting each of the parts on your cut list from the stock, then cutting any joinery. Then you shape the wood. When all of that is done, you get to glue everything together (you did remember to buy glue when you were buying all the materials you needed, didn't you?) Finishing The last step is to finish the project. By this we mean you're going to apply stain and some kind of a top coat on top of the wood to protect it from abuse. Finishing is an art unto itself. We will talk about it when I get to that stage of my project. Note that when it comes to finishing, you don't have to wait until the project is assembled to apply the finish. You can finish the individual parts before you glue them together. This can actually help you side step some problems that can occur when glue squeeze out gets on the parts. Actually, the problems you're side stepping are problems that occur when you go to finish later. My next entry will be in a few days when I'll be posting about the corner cabinet's design. See ya later!

Monday, October 15, 2007

Welcome to the Woodshop!

I'm a hobbyist woodworker from New York state. I've been making sawdust for about 4 years now. I've got a number of projects I've made over that time that I have shared on the WoodNet forums. I started this blog because I've begun work on another project for my wife and I wanted to share the experience with anyone who might be interested. There are always opportunities to learn new things when you're working on any project (read that, "mistakes will happen"), and a new woodworker may find some of this helpful. I felt that doing this with a running post on the WoodNet forum would be more work than setting up a blog. This project will be the most complicated one I've undertaken to date: a corner cabinet designed to match the china cabinet in our dining room set. So there will probably be lots of learning opportunities! Thanks for visiting my blog! Tony