Now that we've got all the lumber, we have to figure out which boards will yield which parts. This is more art than science.
Some of this was easy for me. For example, I had specified 1/2" thick stock for the blanks to make the door panels from. This material came to me already planed to 1/2" thick. So I was able to put these boards aside, knowing I'd get the pars for the door panel glue-up from them. Also, I have a number of moldings to make and their thicknesses start off around 7/8" or 15/16" thick. Again, the stock for these parts was easy to identify & put aside.
To get started on the rest, I hand entered into CutList Plus the dimensions for all of the stock I had on hand. When I had the moldings in the list, I kept getting messages from the program about not having enough stock. So I removed all of the moldings from the cut list because the program isn't smart enough to figure out, for example, that you can cut several moldings 1/8" thick by 3/4" wide from a 3" wide 3/4" board. The program easily fit the rest of the parts on my stock.
Here's an example of what one of these layouts from CutList Plus look like. There is a total of 20 of them in the project.
Now, even though CutList had generated all of these layouts, I just used them as a starting point. There's no way to specify to CutList where imperfections are in the boards, so it doesn't take them into account. CutList just assumes that the entire board is clear with straight grain & you can rip & cross cut parts sequentially from a given board. A board from a real tree is rarely so generous.
One of the cool features CutList has is it will print out labels with information you specify about each part . This allows you to take a board, roughly lay out where on it each part is to be cut, then stick the appropriate label onto the wood. No damage is done to the surface, as contrasted with pressing too hard with a pen or pencil, or staining the fibers with ink. Once the parts are all cut out, it also helps you identify which piece is which, so you'll know where to put it in the final assembly.
It took a couple of hours, but I finally got all of the major parts laid out. The only parts not laid out on the solid oak are the moldings. I'll deal with the moldings later when I get to that point while building the cabinet.
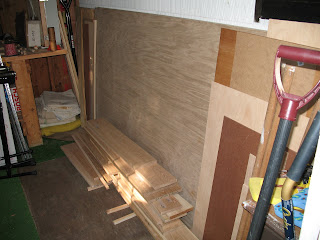
I also didn't bother laying out the cuts on the plywood. The sheets are too heavy & ungainly to handle easily. These just went up against a wall in my shed & are waiting to be cut up. In spite of what CutList says, I will cut the four (4) top & bottom shelves from one sheet, the four (4) adjustable shelves from another, and all of the back pieces from the third. It's just easier to get parts that have to be the same size identical if you cut them with the same set up.
Here's what all of the stock, including the ply, looks like stored in my shed.
We also need to get hardware! The cabinet will sit on three (3) adjustable leg levelers to compensate for the floor & tack strips in the corner. We need two (2) hinges for each door that match those used on the china cabinet. We need two knobs for opening & closing the doors. And we need catches to hold the doors closed. And adjustable shelf pins. Gotta order all of this stuff now so it will be here when we need it!
Plus I'm getting a little old to be lugging around 4' x 8' sheets of plywood weighing close to 100 lbs. I saw a post on WoodNet with a picture of gadget that you slip under the edge of a sheet of ply & it looks like it makes carrying the sheet a lot easier. Think I'll order one of those, too.
Next time: So just how do you make a corner cabinet?


No comments:
Post a Comment